
My custom raku tile backsplash
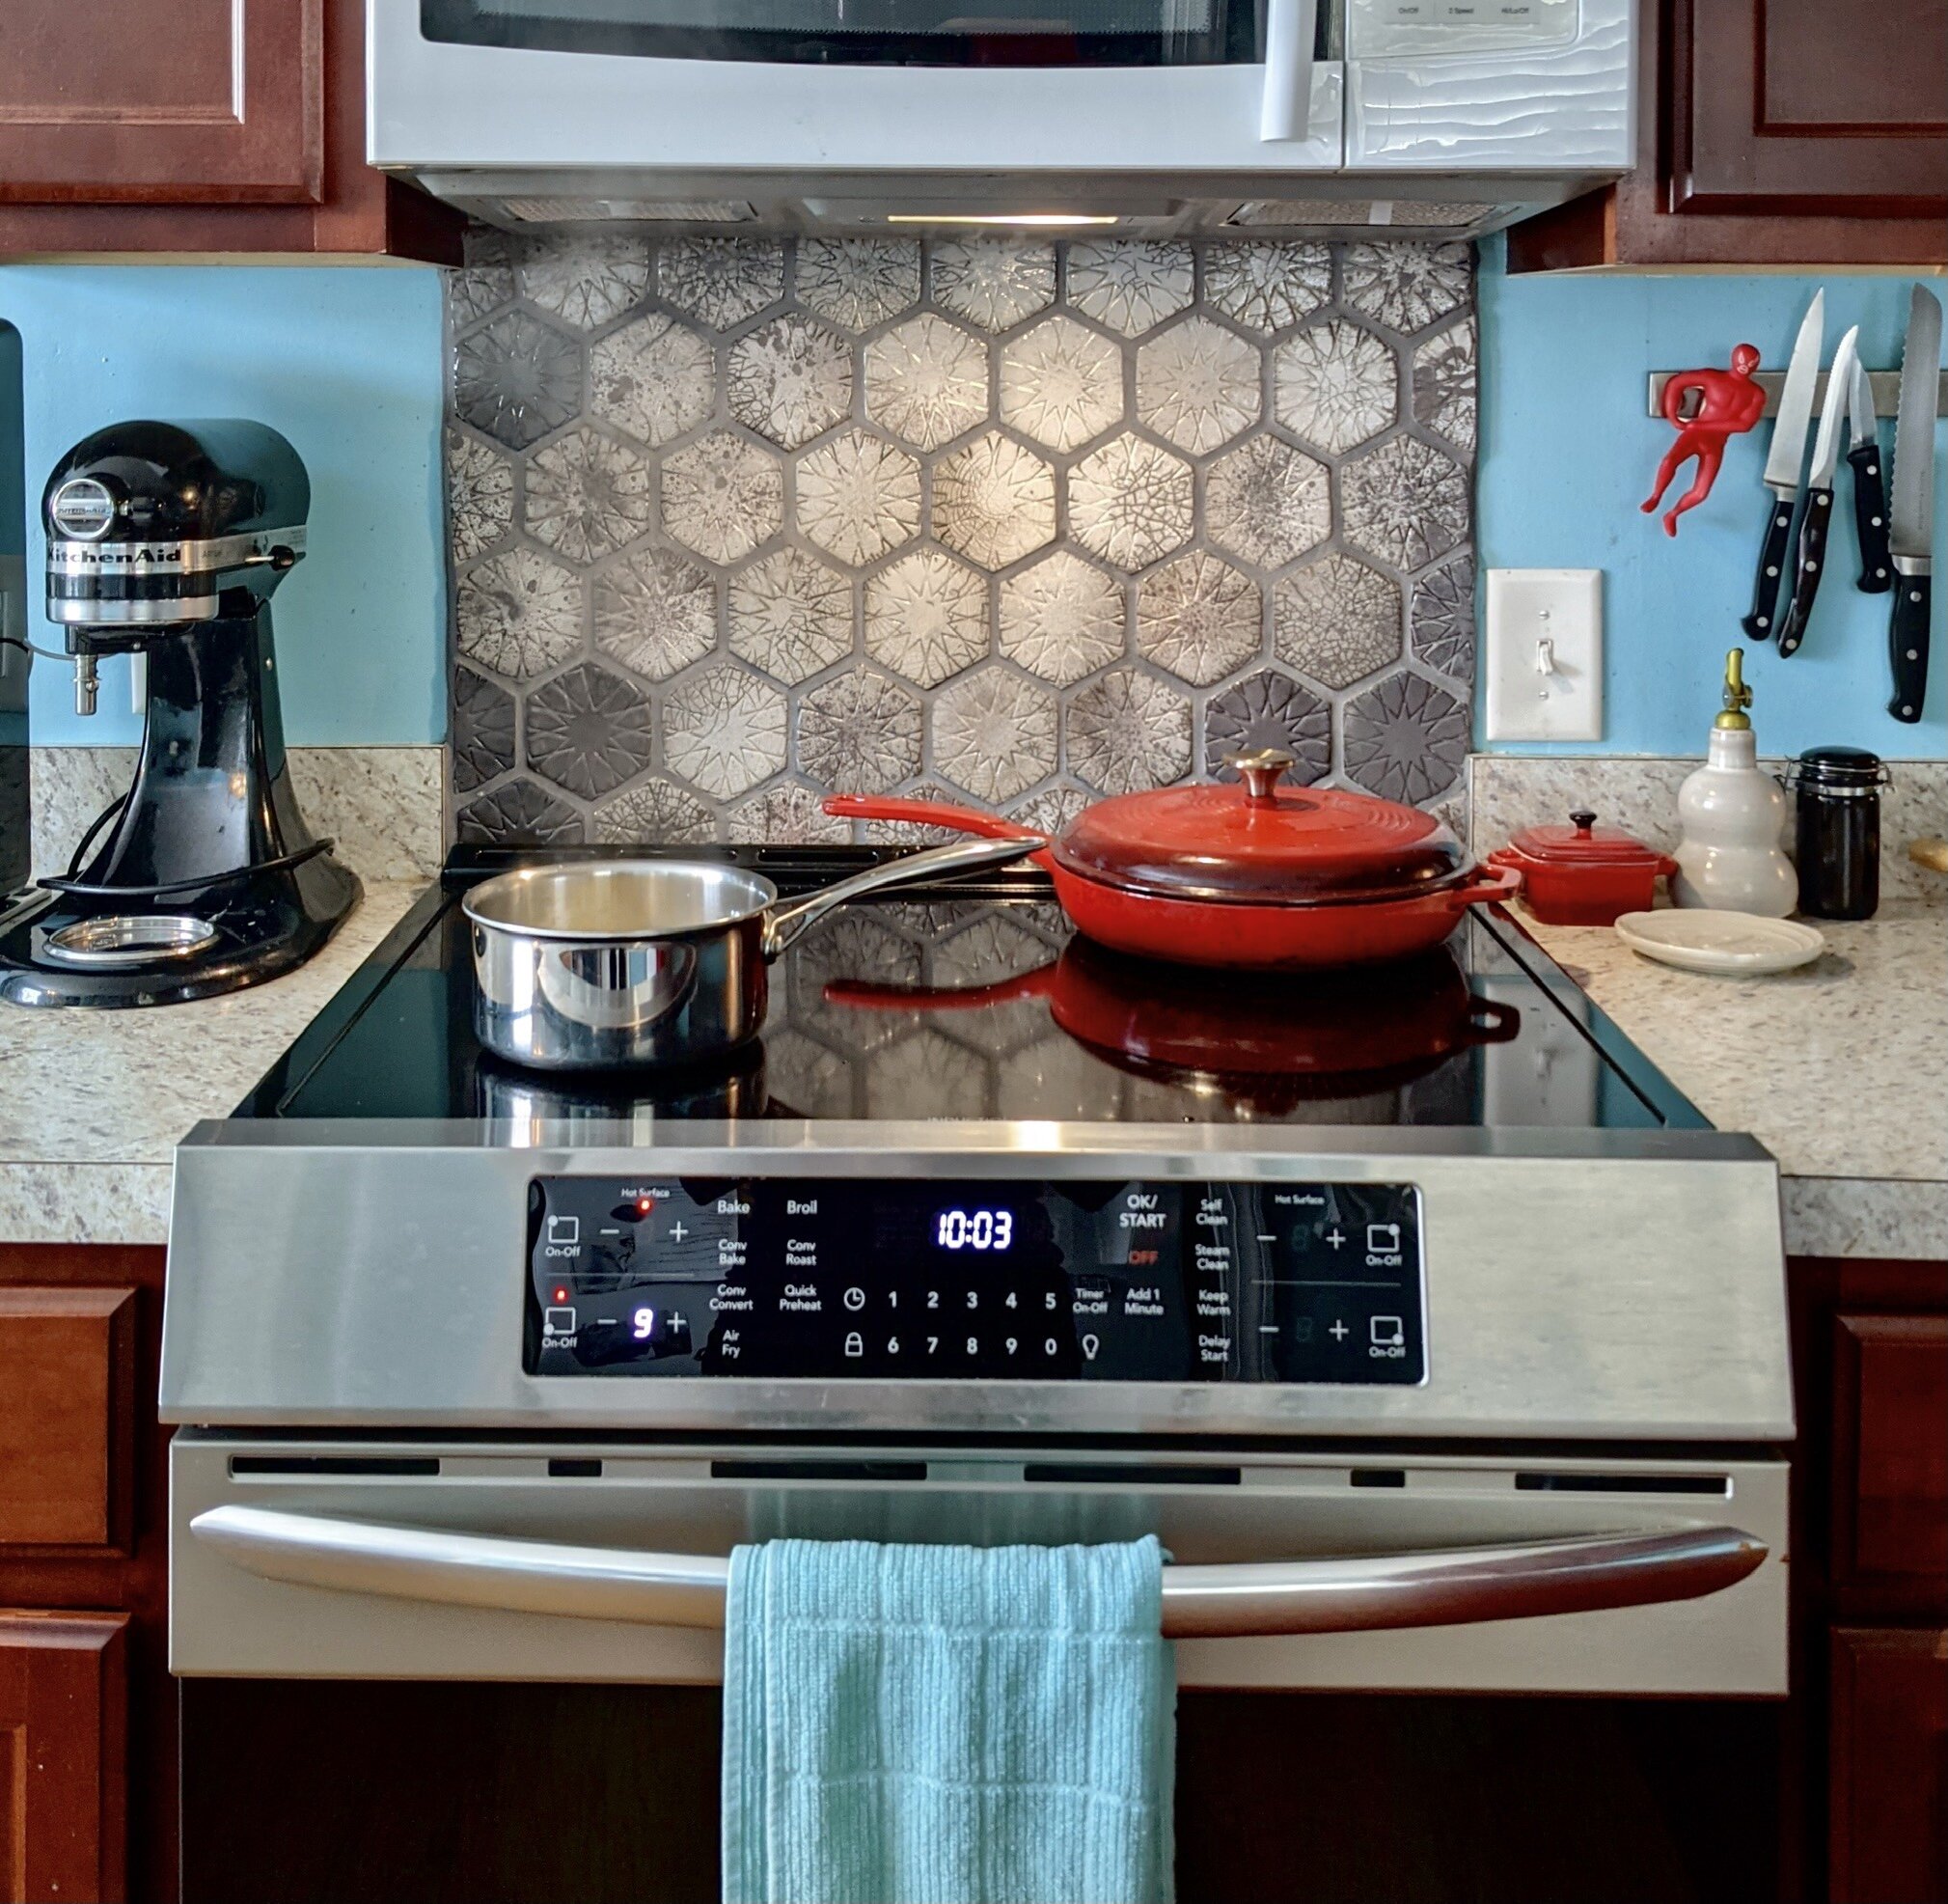
This project has been months in the making, years in the yearning. I feel giddy about having finished such a big project that I did just for me, for my very own kitchen. I created a custom tile backsplash for over my stove, using my favorite shape: hexagons. I want to walk you through each step, because it truly is a custom project at each stage: design, construction, finishes, and installation. I am so proud to share the story here, in hopes it will inspire you to tackle that big thing you want to do for yourself.

the Before: see the awkward gap in the 4” kick behind the countertop?
In May of 2020, like everyone I was cooking and baking a ton at home. I love doing both but my old stove was not up to the job. The old gal struggled to even get past 400 degrees which means she couldn’t handle even frozen pizza. We bought a new stove that does not have a back panel. This left an awkward ~4 sq ft wall surface behind the new stove. I cook with oil and tomato sauce a lot. The risk of splatters made this a great spot to cover up with tile. Will I cover my whole kitchen backsplash in tile? No, it’s not necessary for me and I still like having the aqua paint shine in some parts. I surely do not have one of those “all white kitchens”. Mine has aqua walls, chestnut brown cabinets, warm oak floors, red accents, laminate countertops (don’t hate- they’re so forgiving) and a few other colors and finishes mixed in. But it works, I promise ;o) I wanted to make a backsplash that had hints of some of these colors but with a subtle pattern.

Tile sketch made in Procreate
I started the design not in my pottery studio but on the couch, on my iPad. I began playing around with hexagon designs to help me visualize them in that 4sqft space. I use an Apple pencil and Procreate for my doodles and drawings. The early designs started out like this, in an attempt to show what a raku-fired surface would look like.
Once I got an overall idea of the size of the tiles, I dug deeper into creating the perfect star design inside the hexagon that would also look striking when repeated from tile to tile. I learned in a design class in Spain that tiles should not just contain their own design within but create a design across the whole tile installation, as each tile relates to its neighbors. The tile makers of southern Spain and Morocco are the masters of intricate, repeating designs.

Geometrtic design made using Entangle
To create a precision geometric design, I used the Entangle app for iPad. While it has its limitations, I have not yet found another program that allows you to create these radial geometric designs so easily. You can save your designs as a JPEG, which I used to have a custom 3D-printed cookie cutter made by Cookie Cutter Empire.

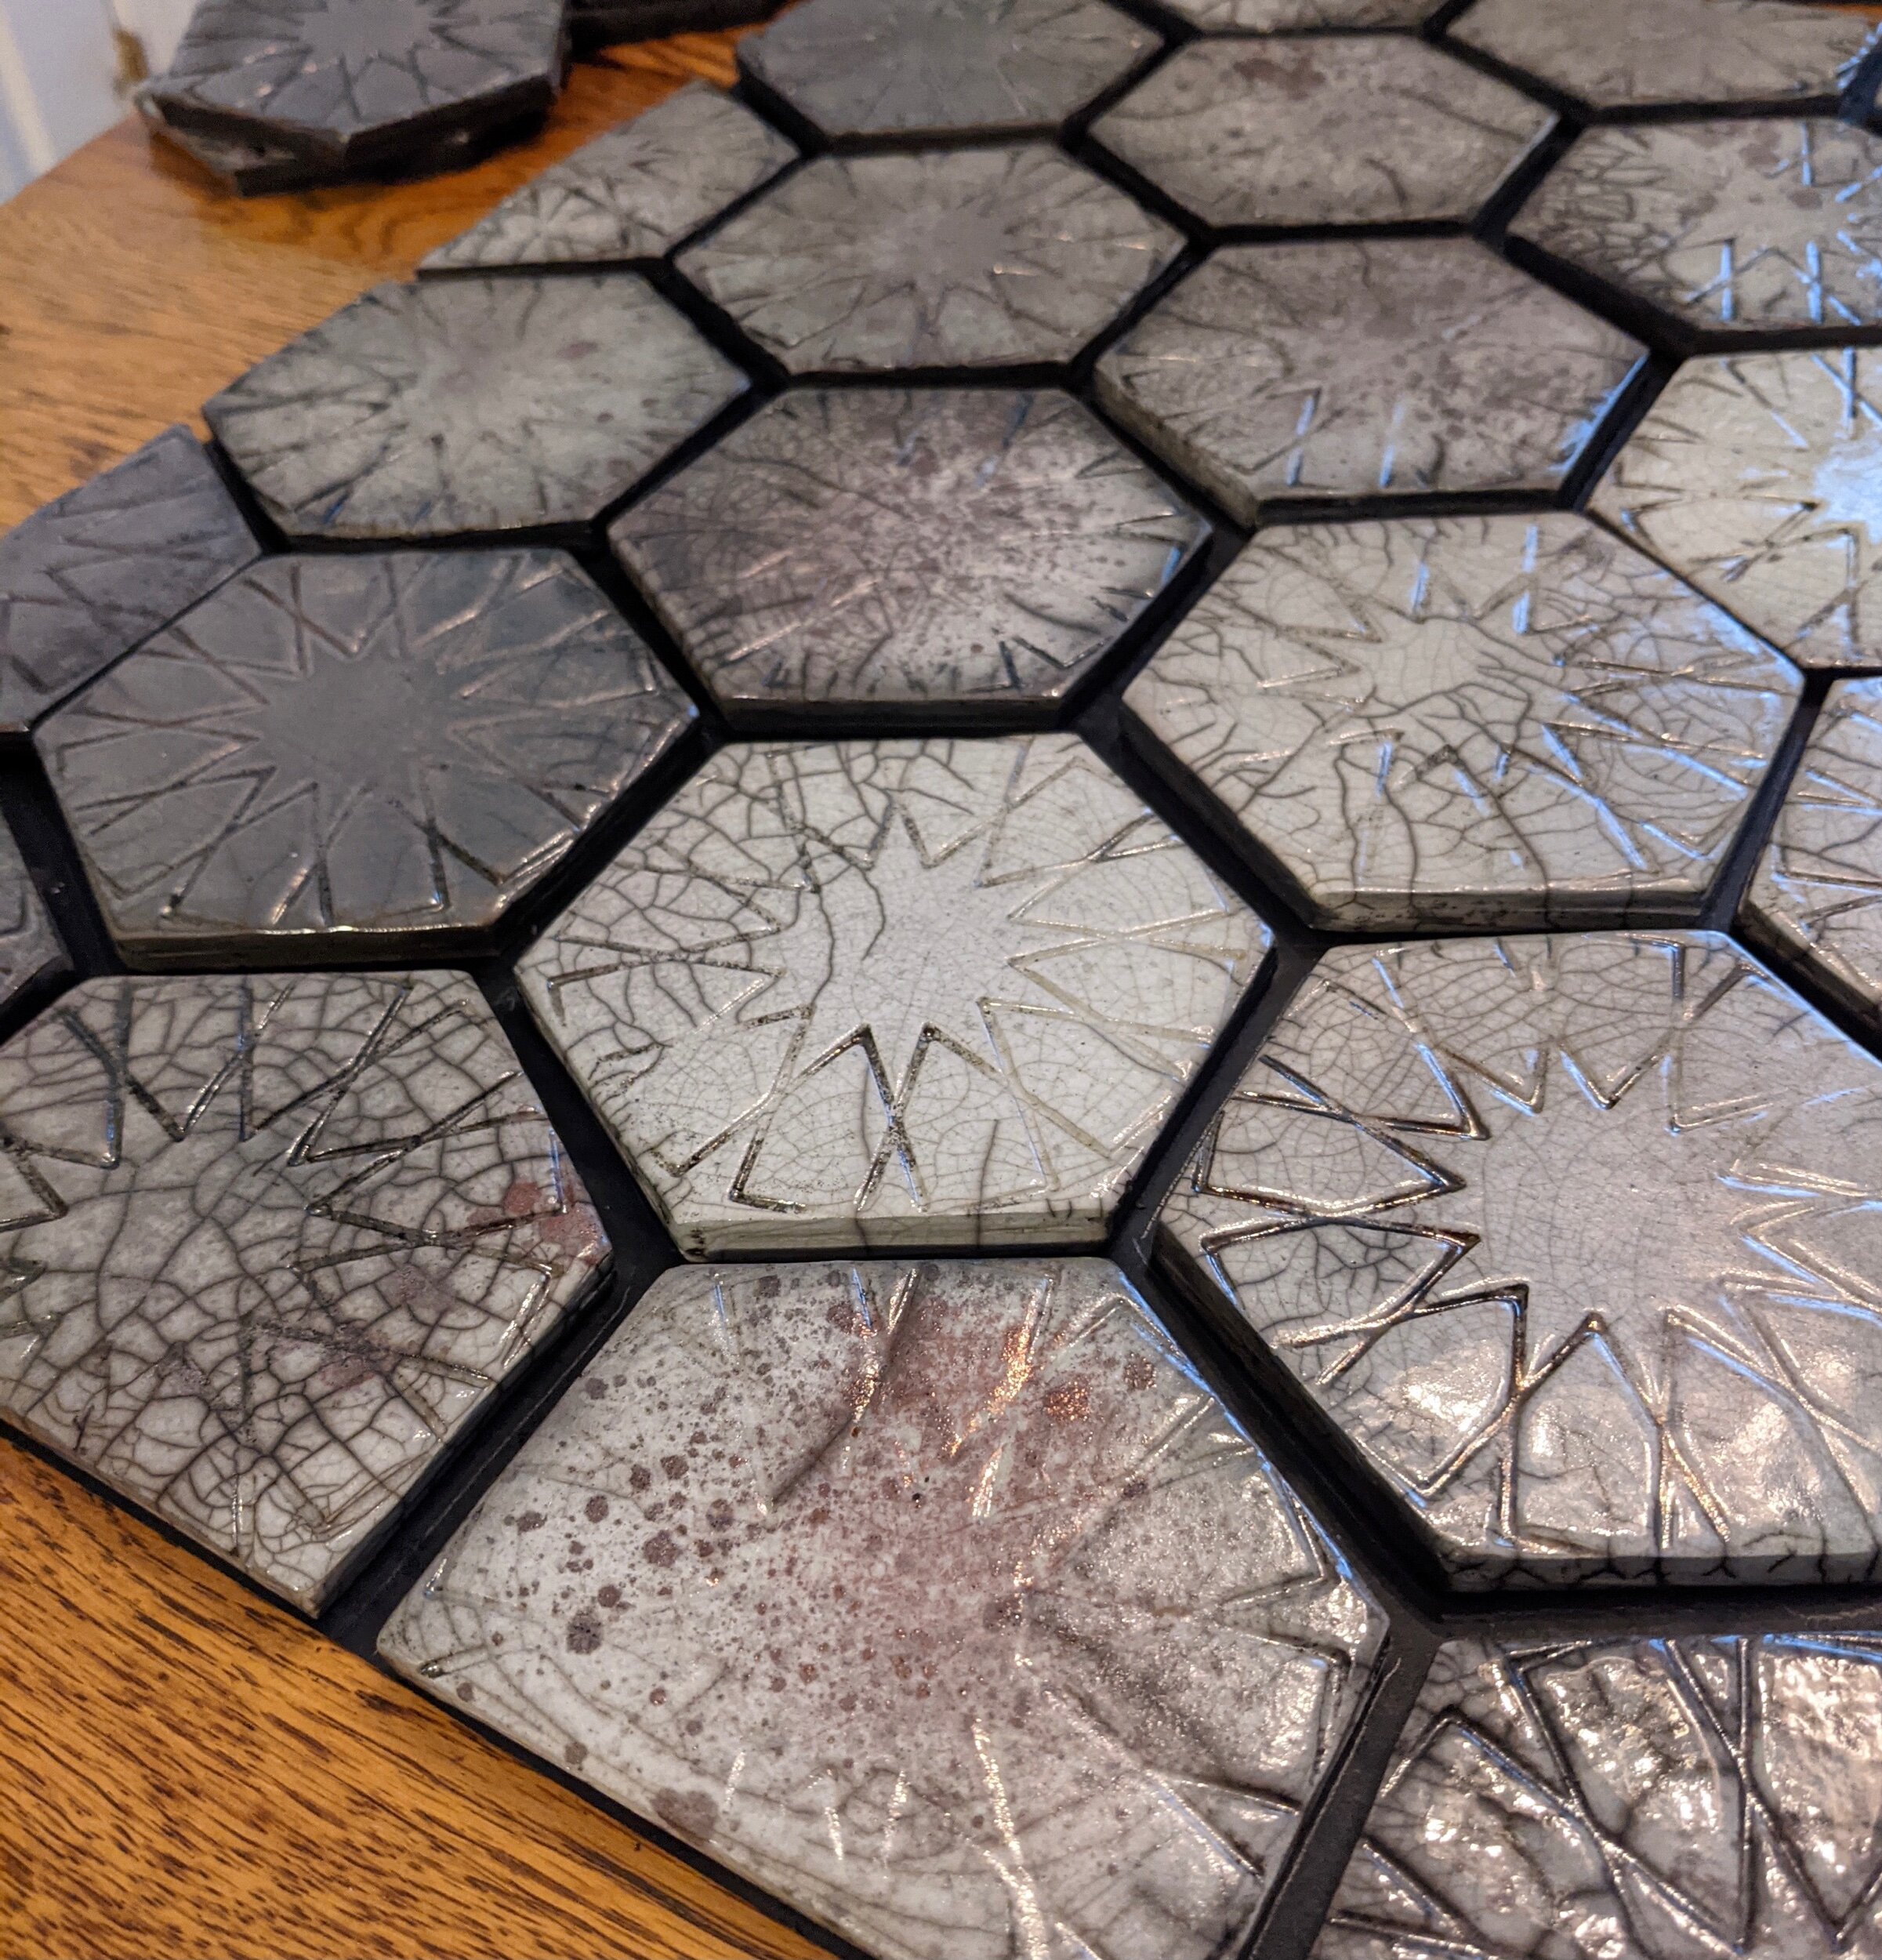
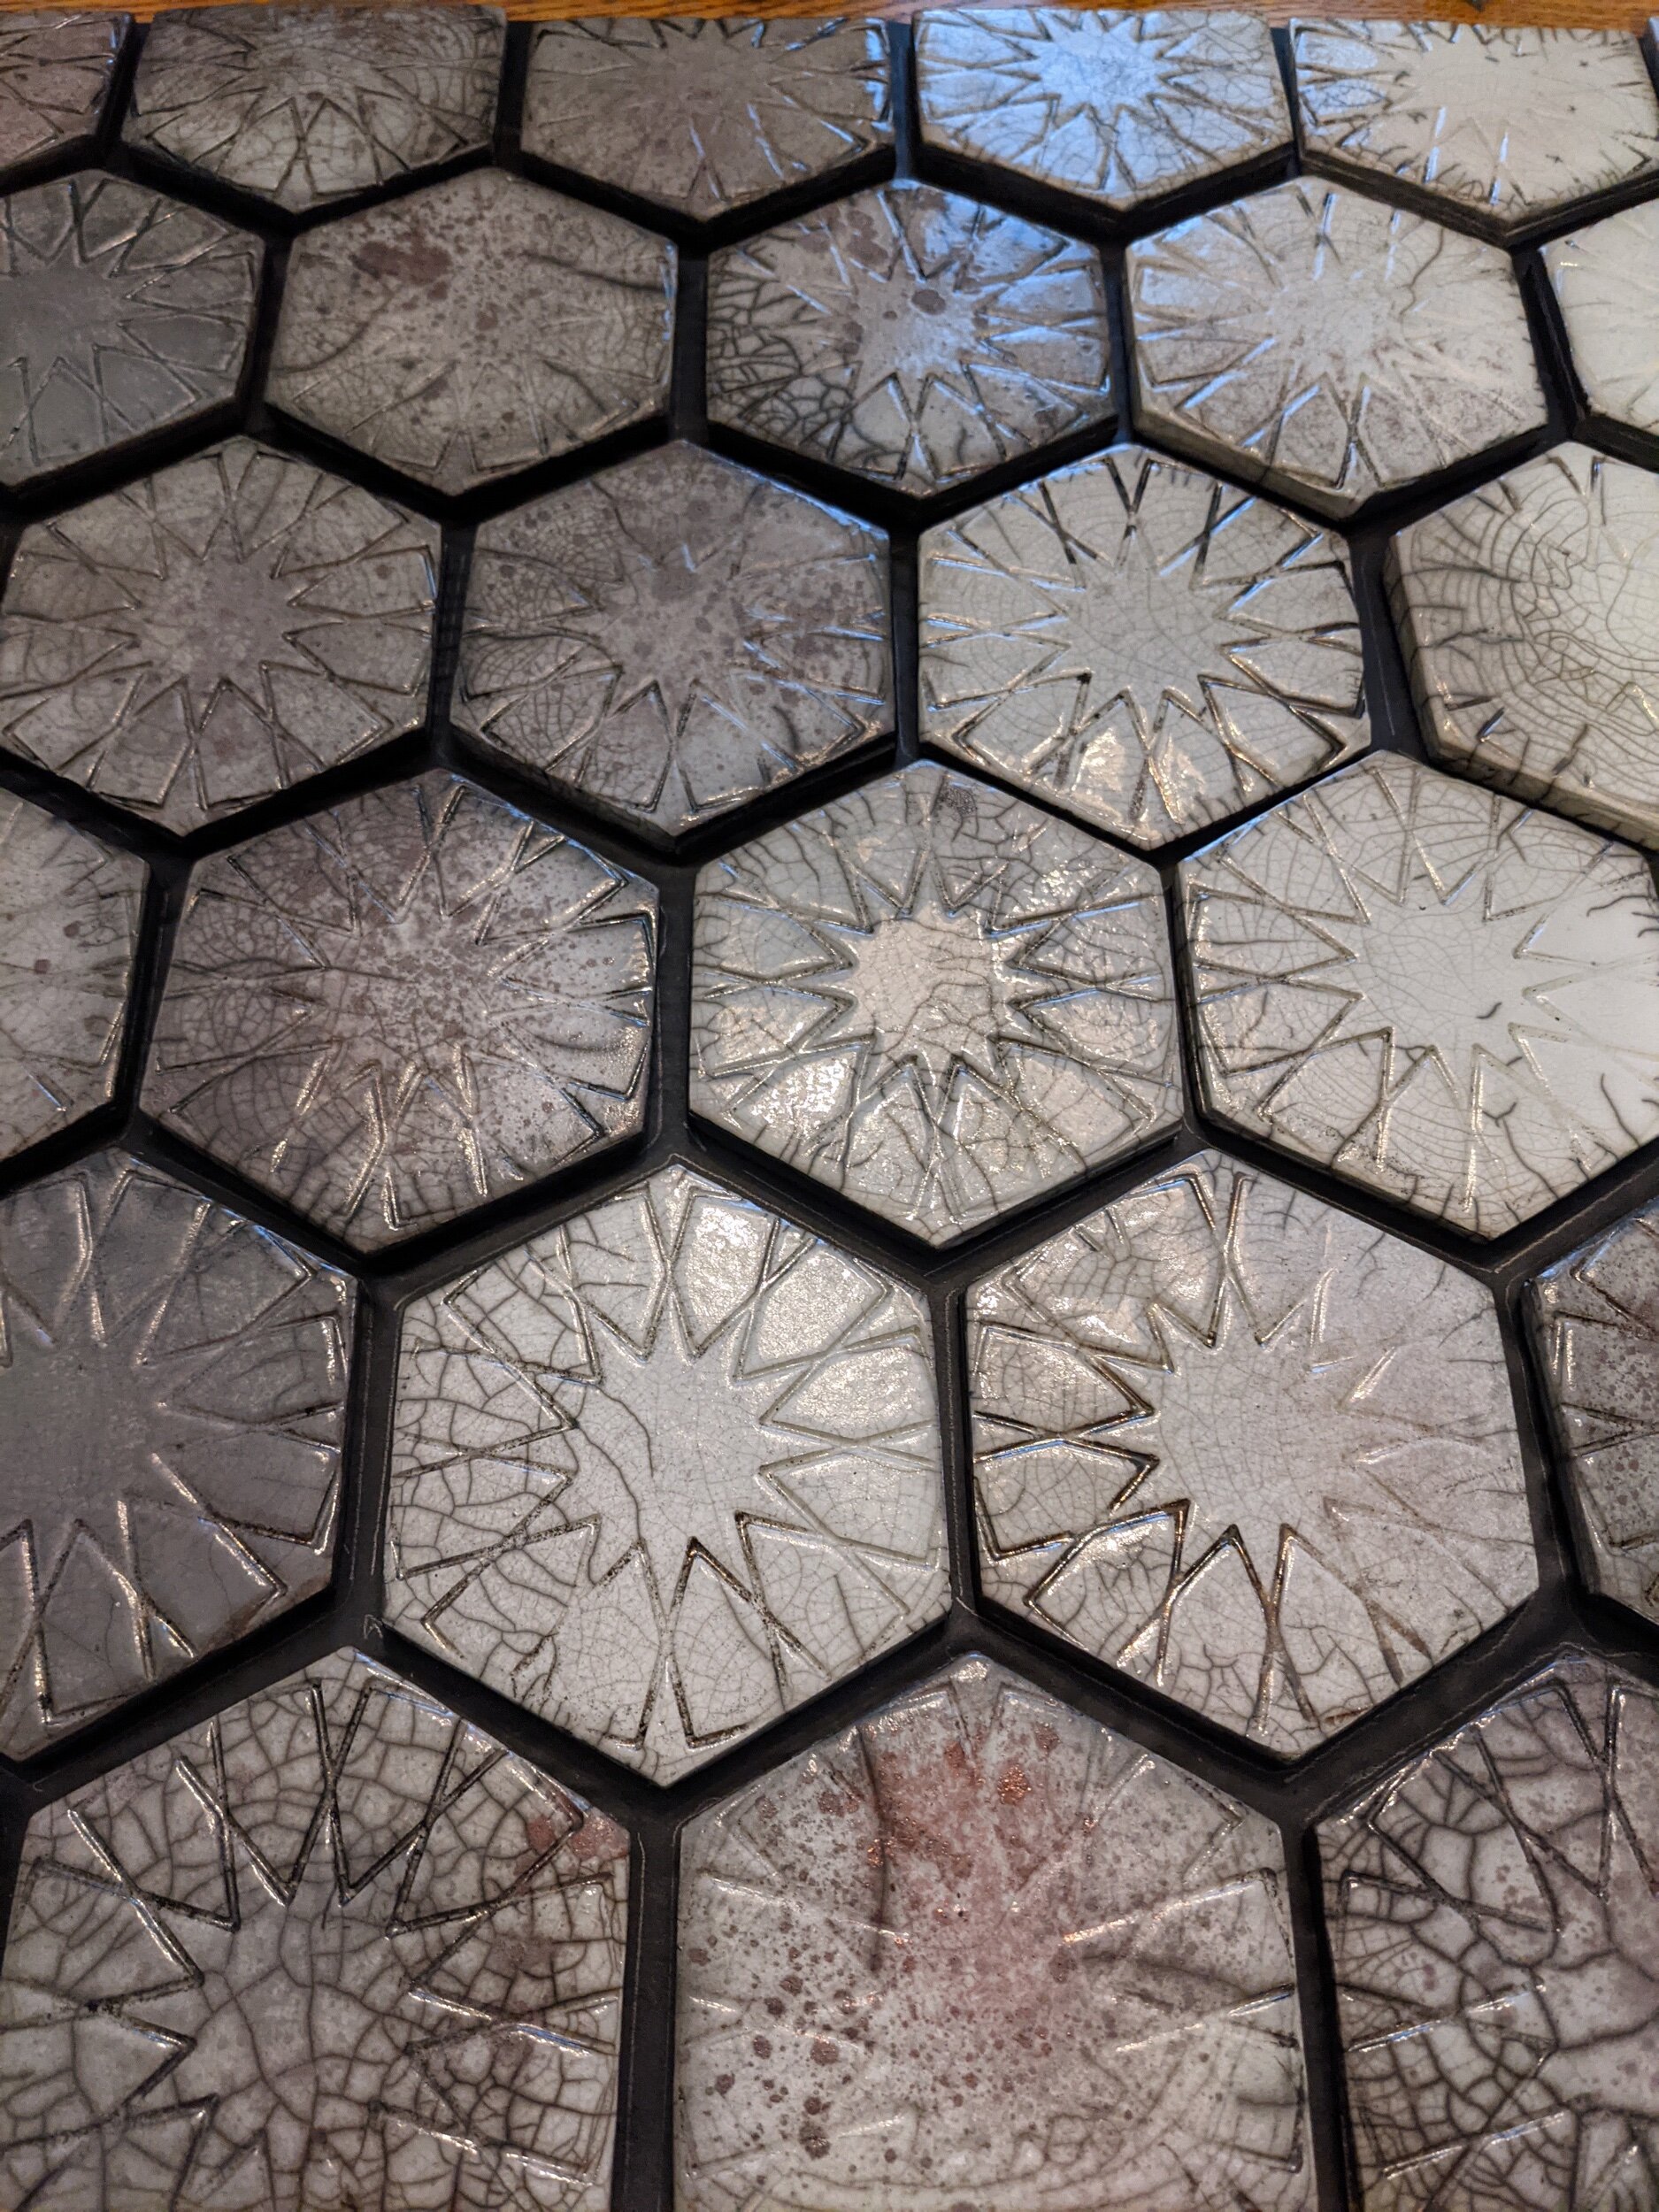
Tiles freshly cut and stamped
Now the process finally starts to involve clay. I used a white stoneware and porcelain mix of leftover clay that’s been sitting in the studio. Because I was raku firing these tiles, they didn’t need to be a temperature-specific clay. I make tiles by rolling out slabs of clay by hand using this heavy duty rolling pin by Thorpe. I roll them to about 3/8 of an inch thick, but I know potters who roll tile thicker. Any thinner and it tends to warp as it dries and fires. Nobody wants to install warped tile. I used the custom cookie cutter to impress the star design and outer lines showing me where to cut. It is a delicate balance of pressing the cutter enough to make marks but not enough to get the clay stuck in the cutter. In the future I may let the slabs harden a wee bit more before using the cookie cutter.

Bique fired and waiting for glaze
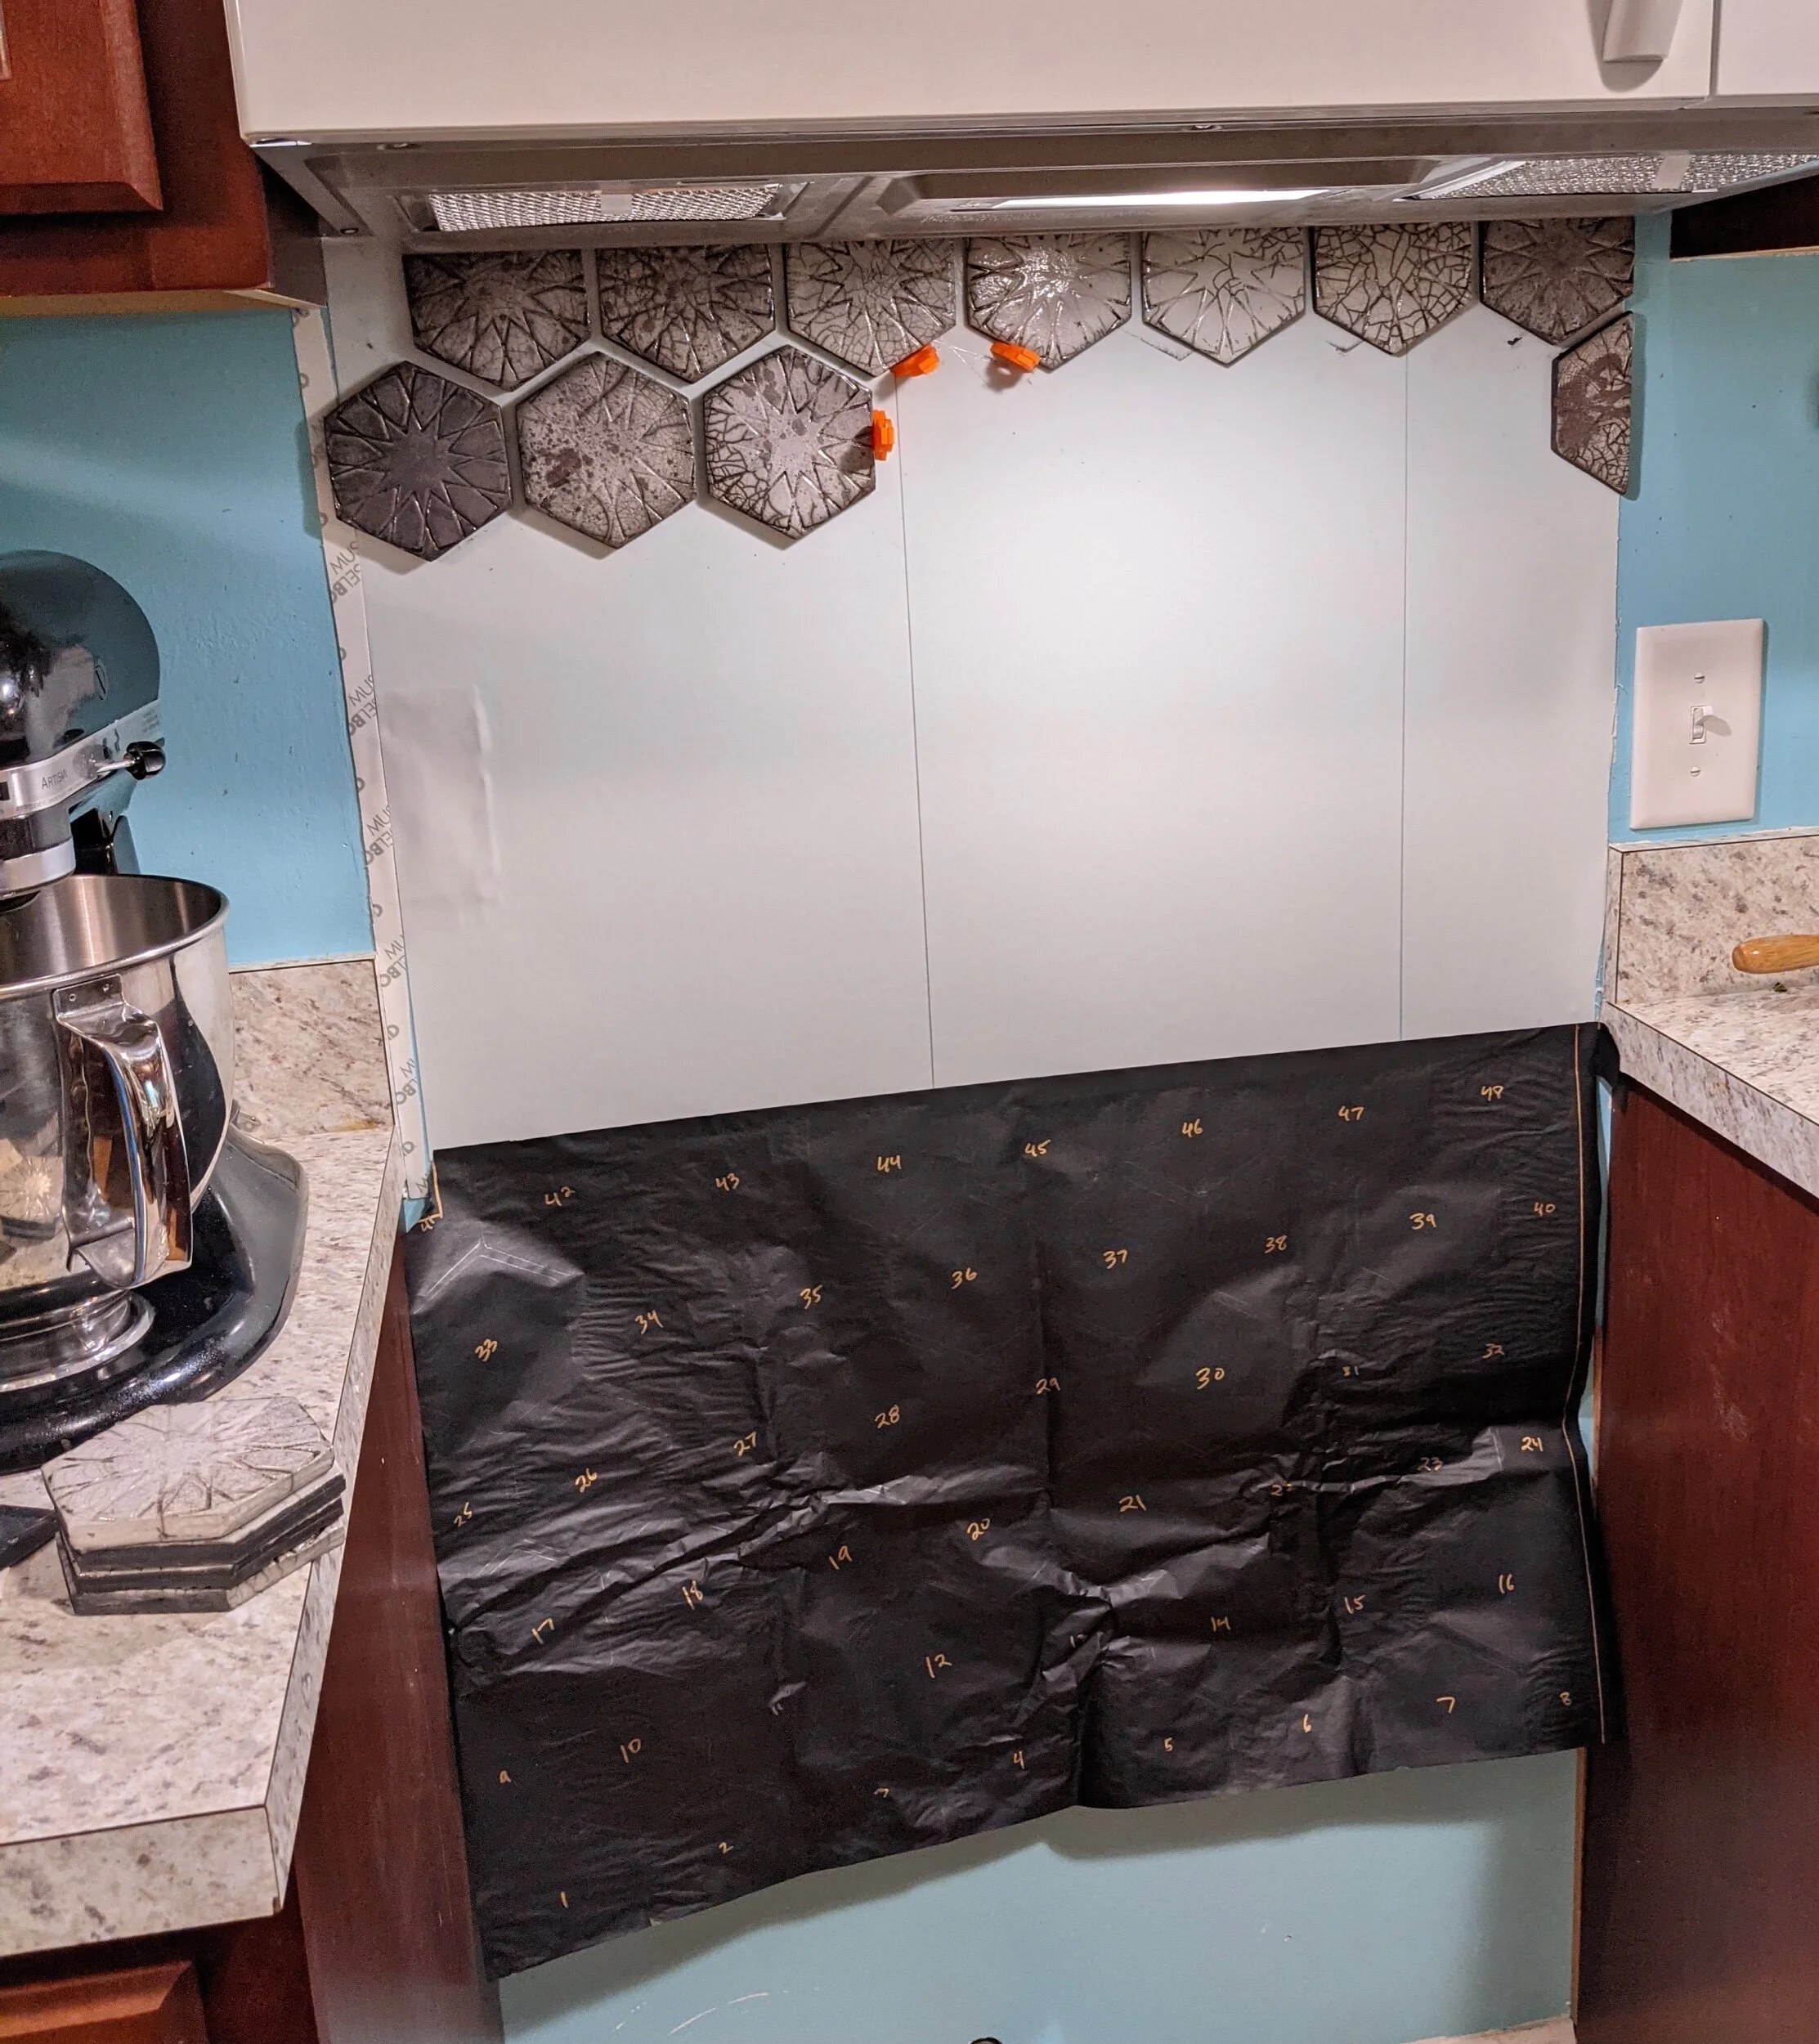
Because tile is particularly vulnerable for warping, it must be handled as little as possible, all within the flat plane of your ware board. I make them on sheets of newspaper on a drywall board and then let them dry slowly between two pieces of drywall to keep them flat. Once they are fully dry, I fire them in the electric kiln for a “bisque” firing. There were about 60 tiles in all this time. Most were whole hexagons but I made some shapes that were partials for the edges so it would all fit in a rectangular space. I learned, however, that a Dremel is a decent tile cutter so I will just make all hexagons next time.
The next part was the trickiest: raku firing all those tiles. Raku involves a fast firing in an outdoor kiln fueled by gas. Once you get to about 1600-1850 degrees, the pots or tiles have to be pulled immediately out of the hot kiln and placed in metal bins full of combustible materials. In my bins I use dead leaves and lots of sawdust from my dad’s woodworking shop. This time I used a variation on my usual clear crackle raku glaze but added some copper in varying amounts for a metallic look.


Because my raku kiln is small and each load requires so much hands-on work, I can fire no more than 10 tiles at a time. It took over 6 firings across 3 days when we actually had decent weather. The one benefit to all those firings is that you get to test and tweak your glazing and firing with each one. The tiles vary so much in darkness because I adjusted the glaze to get the more medium shade in the end. I wasn’t intending to have such a range of light to dark in my tiles, but I went with it and now really like the look of them all together.

I have never installed tile before so I watched a lot of YouTube videos. I also found this adhesive mat at Lowe’s, which was so much easier for adhering the tile to the wall instead of dealing with thin-set mortar. You can immediately grout after applying the tile.. I set the tiles 1/4” apart, which is a pretty thick grout line but recommended for handmade tile. The grout I used was a medium gray. And that’s pretty much it. You know, only like 5 paragraphs worth… ha!


I am now thinking of what do put in the 6 sqft space over my kitchen sink. I am not up for raku firing that many tiles, but I think I will stick with the same hexagon shapes. I may do a gray wash and a matte clear glaze on white earthenware tiles to be fired en masse in the easy electric kiln. I haven’t decided yet. I am also working on a design for silkscreened pattern tiles for my friend’s new house. I have some tweaking to do on the pattern so I get it just right. Stay tuned as I tackle these upcoming tile projects. Maybe you’ve been wanting some custom tile for your home? If so, I may be your woman for the job.