
A face mask that fits
As many of you know, I traveled to China in January, just as the corona virus epidemic was becoming a thing there. Due to the poor air quality in China, my husband loaded up my suitcase with disposable masks and a reusable cloth mask with a filter. The masks did help with the irritating polluted air and cold winds. They also came in handy as the spread of the virus grew and mask wearing became mandatory. We had to wear them to grocery shop and enter the airport. We left China 5 days earlier than planned to make sure we got home. In both airports almost 100% of the people we saw were wearing masks, as well as on our two flights home. I don’t know where we would have found masks had they not already been in my suitcase. To this day, I am deeply grateful for my husband’s knack for preparedness. And, bonus: wearing a mask in flight keeps me from getting my usual air travel runny nose.
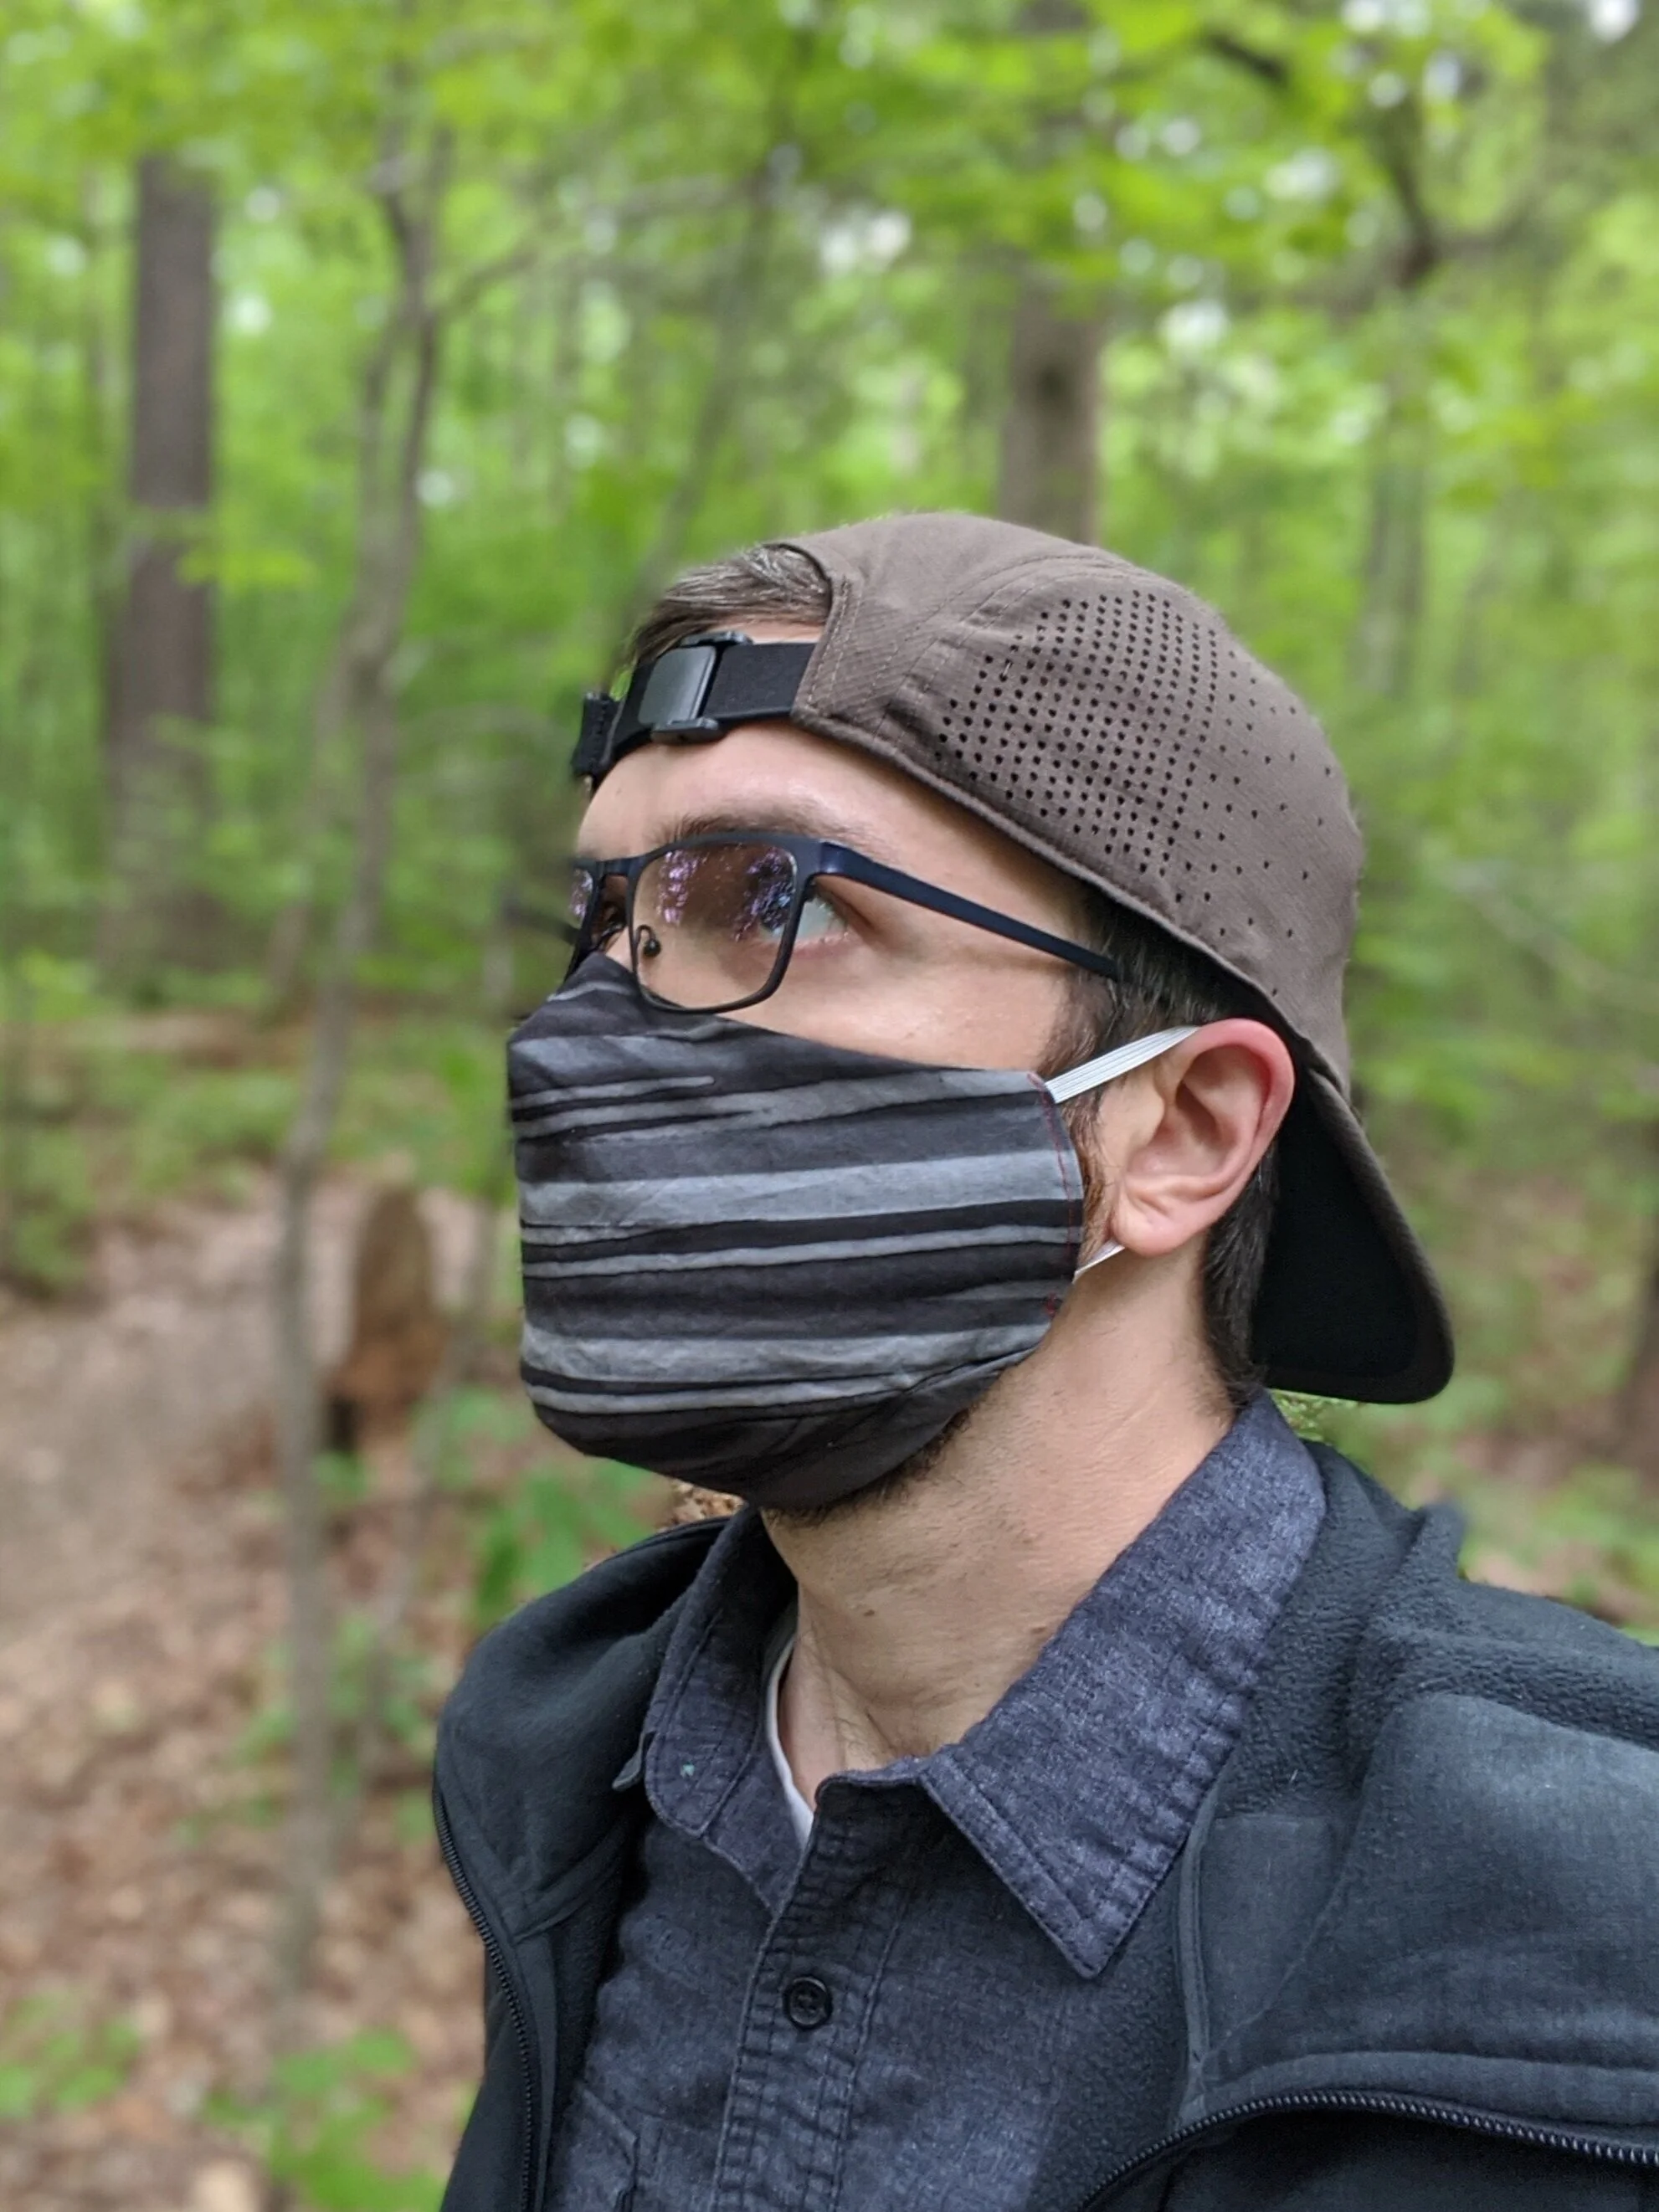
I have been wearing that same washable cloth mask quite often here back at in North Carolina. The pollen has been terrible this spring but we’re spending more time outdoors as a way to get out of the house. Whenever I go to the store or do curbside pickup, I wear my mask. While it does not protect me like an N95 mask or heavy duty respirator, it sure is better than nothing and it keeps my germs from spreading to others. It has become my most essential garment of 2020. My husband requested a mask, as he got tired of using his bandana when we go out. I traced my own mask to create a sewing pattern, modifying it to fit him but still fit the filter inserts I’ve been using in my mask. Then I made a mask for his mom. And now I’m sharing this pattern and instructions with you. I haven’t been satisfied with other patterns I’ve seen out there and have heard complaints of masks that slide, suffocate, or restrict movement. I like this pattern because it is actually fitted to the shape of my face using darts and seams. It’s tailored. Although it requires a few more steps and decent sewing skills, I think it is worth the effort. Maybe you are the kind of person who enjoys a good sewing challenge. Try it out and send me your feedback. If anything doesn’t make sense let me know so I can clarify. I hope this helps you stay comfortable, stay fashionable, and stay safe.


Printable instructions: click here
Printable sewing pattern for women’s face mask
Printable sewing pattern for men’s face mask

How to sew a fitted face mask
Materials:
Tightly woven cotton fabric for outer fabric and lining
Metal wire for the nose (2” long)
Elastic, shoelaces, or ribbons for ear loops or straps
Filter insert (optional)
Instructions
*All seams 3/8 inch
1. Hem the sides of C: Fold the edge of each side 1/4” over , then fold it over 1/4” once again and iron. Top stitch.
2. Dart the nose: With right sides together and folded along the center, sew along the dotted line at the top of each piece A and C.
3. Place C on top of the lining fabric A, right sides up. Place outer fabric A wrong side up on top of piece C. Line up along the top edge, matching the notch on each side. Stitch between the notches about 1/8” or as close as you can to the top edge.
4. Curl ends of wire using pliers or hammer them flat so they don’t poke through the fabric. Place the wire inside in between outer A and lining C pieces, touching the stitching between the notches. Sew a 3/8” seam from the top X across the whole top of the mask to the X on the other side, making sure wire is trapped between the two seams.
5. Sew from each notch on the top of A down to the seam. This creates a box to hold the wire in place.
6. Attach the outer chin: For the outer fabric, place B on top of A with right sides together, matching the center dot and dots at the side. Pin and then sew along the bottom. This seam will be curved so using pins helps.
7. Attach the lining chin: For the lining fabric, Place B on top of C and A, right sides together. Match the center dot on A, B, C, and dots at the side on A, B. Pin and then sew along the bottom, as you did in the step above.
8. Add the ear loops or straps: Attach the end of each ear loop onto the right side of the outer fabric piece A. Stitch them in place using a few stitches on the two X’s at the sides. The loops should be curving toward the center of the mask with the ends pointed out to the side (opposite how you will wear it when finished). Adjust the length of the ear loops or straps as needed to fit.
9. With right sides together sew outer fabric B to lining B along the bottom, starting and stopping at the X.
10. Turn the mask right side out. Iron all the seams flat. Fold the edges on the sides about 1/4” in and top stitch along the side edge.
11. Bend the nose wire to fit and slide a filter insert into the pocket created by piece C.